 The pumpkin is characteristic of autumn and synonymous with October and Halloween, it is also variety of squash and its true name being a cucurbita, which is the latin name for gourd. A gourd being a trailing or climbing plant, containing large fleshy fruits with a hard skin, some varieties being edible, others for decoration.
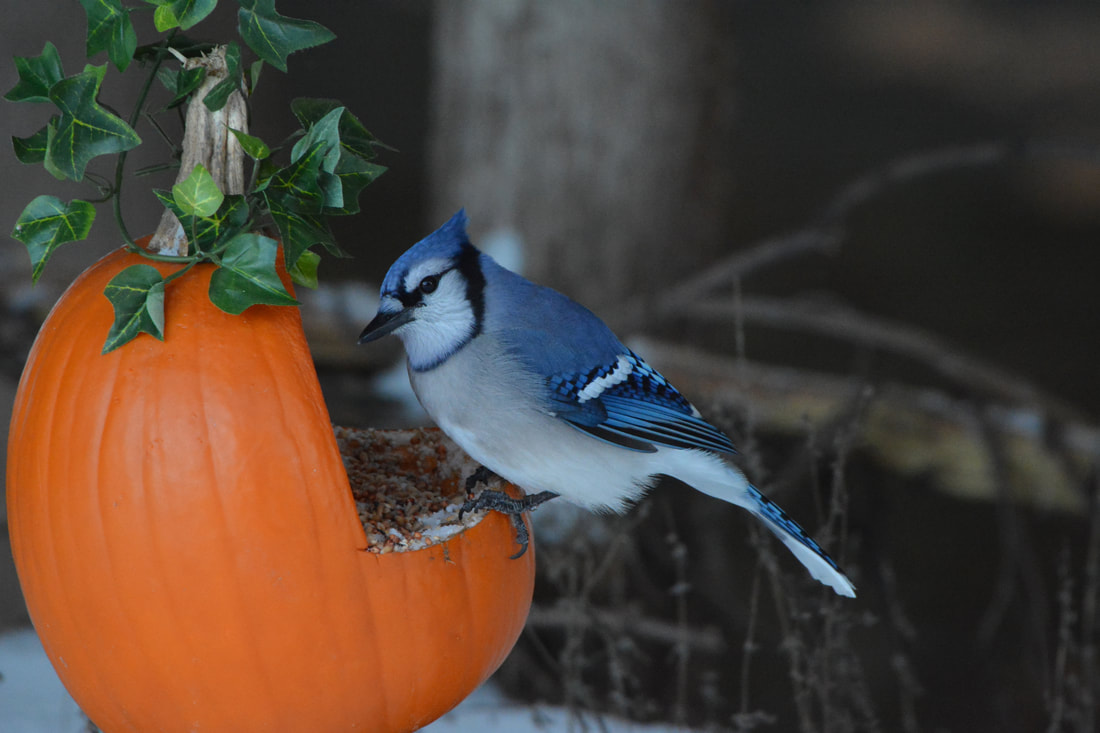
As a guide, the middle of October is an ideal time for harvesting of squash and pumpkin, however, one should be vigilant, they are frost tender and to harvest before the first frost is strongly advisable. Allow the fruit to mature and colour wholly on the plant prior to the harvest, the colour being dependant on the type and variety which is grown. The skins should be hard and not easily dented by a fingernail and its shine will also be slightly diminished. A soft outer skin will be susceptible to damage and eventual rot. If the fruit cannot be harvested before a frost or a large amount of rainfall, then it is recommended to raise the fruit off from the ground, thus it is not in contact with the soil to lessen the chance of rot and infection. This can be done by the use of straw, cardboard or a solid object such as wood or a brick. To reduce the chances of disease and infections it is best to harvest on a dry day and using a sharp knife or pruners and cut the stalk as far from the fruit as possible, ideally 10cm. The stem remaining intact with the fruit is essential for good health and storage and for this reason do not be tempted to carry them by their stems, the weight of the fruit causing it to brake off. The fruit can then be cured, which entails leaving them exposed to higher a temperature, either outside or inside on a windowsill for approximately ten days. This curing will improve flavour, heal any wounds and harden the skin. After they have been cured they can store for two to three months in a cool, dry and dark environment, ideally about 10c. However, beware that it does not become too cold as they may soften and begin to rot. During storage, ensure they are not touching each other and preferably, they are on a wooden surface or cardboard, do not store on concrete as it will increase the chances of rot. Certain varieties of squash and pumpkins are suitable for a longer winter storage, whereas, others are best to be consumed this autumn, therefore, it is best to check which type you are harvesting. The popular squash varieties being the butternut, the golden butternut (coquina) and the striped harlequin are enjoyed with great gusto soon after harvesting. Pumpkins which are best for consumption are not usually the best for Halloween carving and Jack-O-Lanterns. A rule of thumb being a smaller denser pumpkin will contain more flesh and are best for cooking, whereas, a larger pumpkin will have more area for artwork and with less flesh it will be easier to carve. Gourds are extremely high in nutrients and being classified as a fruit they contain seeds too, which can also be salvaged and consumed. It maybe for the culinary delights or for decorative purposes, either way, enjoy the wonderful squash and pumpkin which nature has provided us and after Halloween, why not return the pumpkin to the natural environment and use it as a bird feeder? It will be greatly appreciated. Contribution by Oliver David Cook
0 Comments
 Early autumn is an ideal month to divide the herbaceous perennials of the garden. These are the flowering plants which die back each winter, the roots remaining dormant beneath the soil until the arrival of the following spring, this bringing warmer temperatures which triggers new growth to commence once again.
There are a variety available, producing a beautiful array of colours for the entire summer season. Popular herbaceous perennials are: - Geranium - Phlox - Salvia - Delphinium - Aster - Hostas The question is why to divide? Herbaceous perennials can outgrow their space and look rather messy, particularly in the centres and after division, older plants will have an opportunity to rejuvenate. The garden beds overall may have become overcrowded with plants encroaching on others adjacent to them and without dividing, the following summer the crowding will augment. It is a productive method to increase the number of plants within the garden and to fill any empty spaces that may exist, this being division is quicker in comparison to growing from seed. It can also save money, if the garden has recently been landscaped then it is an excellent way of adding plants and colour to a newly formed bed. When dividing, it is advisable to cut down the summer growth of the taller plants near to the base, then with a garden fork gently lift the plant working outwards from the centre as the most vigorous growth is found on the outer areas of the clump. Alternatively, the traditional method of digging deeper around the perimeter of the plant with the intention of lifting the entire perennial. A spade can be used on the tougher plants such as Hostas and slicing the clump in two after being lifted. The smaller plants such as Geraniums, clumps from the outer edges can be lifted using a garden spade, then once lifted, they can be divided again into smaller clumps with the use of a sharp knife. Perennials with tubers or rhizomes may naturally fall apart when dug, otherwise the tubers are often visible above ground, indicating where to divide. The divisions should be planted as soon as possible and well watered, part of the clump could be replanted in the same position or a different area of the garden. It is beneficial to clean the soil from the roots, the advantage being the health of the roots can be seen as one does not wish to replant damaged or diseased roots or tubers. When ever a plant is lifted it is subjected to shock, however, during the dormant time of autumn the shock is less profound. The plants growth cycle after division will be slow as it recovers from this disturbance. The age old saying being; ‘After you divide a perennial, the first year it sleeps, the second it creeps, and the third year it leaps’. Contribution courtesy of Oliver David Cook on behalf of Green Landscapes Cornwall Ltd  Having made the obligatory bookends back in the mid 70’s, my path to wood-working was set.
Wood is one of those materials that you do not need a huge number of tools to be able to create and craft something from, a simple pocketknife is where most people can start. whittling....... a pointy stick, a bow some arrows, a spoon, a candlestick for granny.... and here the seed is planted for life; great oaks from little acorns grow. I am not saying we will all become great furniture makers or timber building experts, but you can make a living out of it. Over the course of my varied career I have often relied on my wood working skills in between jobs! To physically build something with your own hands I believe is possibly one of the most satisfying things that you can do. Start small and work your way up. Hard or soft, interior or exterior that is the question. Wood has been used over the centuries utilising its natural strength, durability, lightweight, and adaptability to build virtually anything! Different woods have different properties. I will confine my thoughts to the UK rather than the global list of timber. At the hard and durable end of the scale is the mighty Oak, usable both in its natural or ‘Green’ state for traditional timer framed houses or dried for furniture indoors or outdoors. Then there are the likes of Cedar and Larch both known for their natural durability especially outside, as in roof shingle/tiles and building cladding respectively. Then we move towards the softer woods, mainly used in modern house constriction, these can be slower grown such as the Scots Pine, or faster growing and softer Douglas Fir. All woods have their own unique properties such as Willow for cricket bats or Yew for longbows; they can be used in their natural form such as Hazel hurdles or kiln dried for fine quality furniture. "To physically build something with your own hands I believe is possibly one of the most satisfying things that you can do. Start small and work your way up." Whatever you decide to make there is always a tool for it, if correctly sharpened and used it can make your life much easier; but it is amazing what you can do with just a hand saw, a hammer and some nails! One of the most important things to remember is that wood working tools are sharp so that they can cut or slice through the tough fibres of the timber, what you do not want is the same cutting edge doing damage to flesh and bone. I have never met a woodworker who has not had too close an encounter with one of his tools and displays the scars with pride; but I do not recommend it! Now for the juicier bit… how and what to do with that wasted area in the garden that is on too steep a slope to be of any use, except as an Eddie the Eagle practice ski slope. Perhaps you need to extend your internal entertaining house space by taking the inside out! Building a Deck area either alongside your house or to create a special area within the garden does not have to be too daunting a task. In a nutshell, or perhaps I should say an Acorn? There are a few factors to take into consideration. For the sake of this blog I will assume that you have decided on a decking area rather than a stone patio. I will also take a more practical look at the process. Things to consider. What material you want to use, there are several choices; dependent on budget, aesthetics, maintenance, and environmental impact… the choice is yours? Woods like Larch or Cedar that are more water resistant than say pressure treated sort woods. Hardwoods such as Teak or Oak are at the pricier end of the range but require less maintenance. Wood-polymer composite decking, made from recycled plastic and wood fibres, has come a long way in the last few years and in my opinion is a much better alternative to plastic (hollow) decking and has some qualities that start to compete with the softer wood options; both on longevity and upkeep. For a more contemporary feel there is Aluminium, generally made from recycled products. I have recently come across and worked with charred timber planks for decking. A technique originally used by the Japanese in the 18 th century referred to as “Shou Sugi Ban”. The surface of the timber is burnt to enhance its durability and aesthetics. Whether it is a slopey side of a hill or an uneven bit of useless ground beside your home, setting your datum or starting point is essential. I like to call it “The Motherboard”, all boards are created equal, but some are more equal than others! If you get this one right everything generally goes to plan, if not chaos will reign! This could simply be your desired finishing height or the height of an existing step or patio. "I have recently come across and worked with charred timber planks for decking. A technique originally used by the Japanese in the 18 th century referred to as “Shou Sugi Ban”. The surface of the timber is burnt to enhance its durability and aesthetics." You need to keep the decking planks up and away from potentially wet ground, therefore a solid and stable sub-structure is needed. You can either use concrete slabs or blocks or 100mm x 100mm posts concreted into the ground, this is my preferred option as it ensures that what you build stays there! I would then normally recommend 50mm x 150mm pressure treated softwood or 6” x 2” for those of my age bracket (we don't discriminate); smaller timbers can be used if space and height is an issue but you will need to reduce your span distances accordingly. Then to nogging or not to nogging is the question? A nogging or a dwang if you are in Scotland or NZ, is a bracing piece of wood fitted between floor joists to prevent them from twisting under pressure; only really needed with larger structures and greater spans. I find the combination of upright posts and the decking boards themselves do for solid structure, another reason why I like to use posts. Then its just a case of laying out and fixing your boards; two screws in each board on every joist, with a 5mm gap between boards; a good little impact-driver savers a lot of time and your drill. Until next time. Capt. Stardust 20/7/2020 |
Welcome!Here at Penwarne Landscaping we are all passionate about gardens, and believe that outdoor spaces are just as important as indoor ones! In this blog, we regularly share our expertise along with tips and tricks that you can use to make the most of your garden and home. Archives
November 2023
Categories
All

|
 RSS Feed